Diy Wort Plate Chiller
The common wort chiller is basically made of a bunch of loops of copper tubing that is suspended in the wort. And the faster the better!
 25 Foot Stainless Steel Immersion Wort Chiller with No
Finally, connect one end of the plastic tube to the faucet and the other to your drain.

Diy wort plate chiller. Look for the plate chiller with the lowest cooling downtime. Look for the quantity of wort that the plate chiller supports when it comes to cooling. Plate chillers can also be difficult to clean and sanitize.
With all the cleaning, rinsing and chilling, there is a lot of wasted water. Most brewers sanitize their plate chiller in the same way as a counterflow chiller. First of all, let me get this out:
A plate wort chiller is a very different design to the other two types but works on exactly the same principle of heat exchange. Now, i can run boiling wort through them and that will kill any bugs living inside so it’s ok, but it’s still a concern. A downfall for the plate chiller is the inevitable and unfortunate clog.
The glycol will return back into the cooler. A plate wort chiller works on the principle of heat conduction to extract thermal energy from the wort and achieve rapid cooling. So if your heart is set on having a plate chiller, you will just have to buy one.
It cooled the water down to pitching temp in less than an hour. Cooler or container larger than ac evaporator (coleman coolers work well). Pump the wort and the water in and outcomes chilled wort.
With sabco manufacturing a 40 plate frame and plate chiller for $750 with cheapen replacement gaskets it'd be hard to justify a home built one. So, now i have a plate chiller! I had been using an immersion copper wort chiller for a few years, so moving to this plate chiller was a big step up.
If you are making your own wort chiller, especially an immersion. Not all plate chillers cool gallons of wort. The hot wort encounter progressively cooler conditions and it travels through the chiller and continually transfers heat to the cooling water.
It instantly cooled down my wort as i pumped it through. Many plate chillers, however, can be boiled in water to sanitize which is a quick way to make sure it. However, after i fill about 5 large
Then cold water is run through the copper tubing which in turn cools the wort making it ready to put in the final fermentation bucket and pitch the yeast right away. If you ever do build one i'd love to see it. Submerge the wort chiller in your boiling brew about 15 minutes before you are done boiling to sanitize the copper.
Mainly plate coolers are associated with a low volume of wort when it comes to cooling. The chiller described here, when tested with 70 °f (21 °c) tap water, reduced boiling wort to within a few degrees of the cooling water, using a simple gravity feed, in no more time than it would take. Now you run into the next decision, and that’s whether to go with a stainless steel or copper wort chiller.
I’m not convinced a plate chiller is the best method to use. One of the keys to brewing good beer at home is the ability to cool your wort fast. Sometimes the ingredients still swirling about in the wort make it into the chiller, or heavier particles in the trub, which cause the plate chiller to clog up.
How to make a wort chiller for homebrewing: I used hot water to test mine and to also check for leaks. It's also hard for me to justify that for a chiller.
Diy glycol chiller items required. Counterflow wort chillers cool your boiled wort quickly and with less water than immersion chillers—learn to make your own here! Cooling down wort rapidly is important because it helps to reduce the …
Instead of pumping wort and water through coils, the plate chiller pushes the two liquids through thin heat exchange plates. Without a chiller of some kind, your batch is. I'd probably buy a conical fermentor first, and stick with my diy 30' 3/8 copper tube in hose cfc.
If you don't have a wort chiller you generally need to let the wort. While it’s usually immersion wort chillers that are wanted by home brewers, the compact size of a plate chiller. For temperature the plate chiller is simplistic.
To the best of my knowledge, it’s not easy to build your own plate chiller as the technology is a little bit more involved than with an immersion or counterflow chiller. One thing that bothers me about home brewing is the wasted water. These things can clog easily and are basically impossible to get 100% clean.
This model is all business. Once boiling has finished, connect your water source to the entrance tube, point the exit tube to a drain and let the water flow! So you might have looked at all of the wort chiller options out there and decided to go with an immersion wort chiller.
Using a pump to help force the liquid through can help prevent clogs, but the sticky wort will cause issues. Both immersion and plate chillers are designed to accomplish the same task with one’s decision on which to use usually a function of their particular setup. You can get premade stainless coils made for this purpose or make your like an immersion wort chiller.
You do have to make sure you clean it well afterwards, but i think this product is well worth the money. works phenomenally well. Typically my wort came out of the chiller around 80 degrees, then i would take the wort to my fermentation chamber and let it sit until it cooled to the pitching temperature i needed which would take hours, especially for a lager. A wort chiller is one of the most important pieces of homebrew equipment you’ll use.
Or plate exchanger with the wort running through the other side. Another common method involves running the wort through a plate chiller, made of many thin layers of stainless steel, while cool water flows in the opposite direction. Hfs(r) homebrew beer wort chiller (7.5″ 2.9″/30 plate, 3/4″ x 1/2″ npt) check latest price.
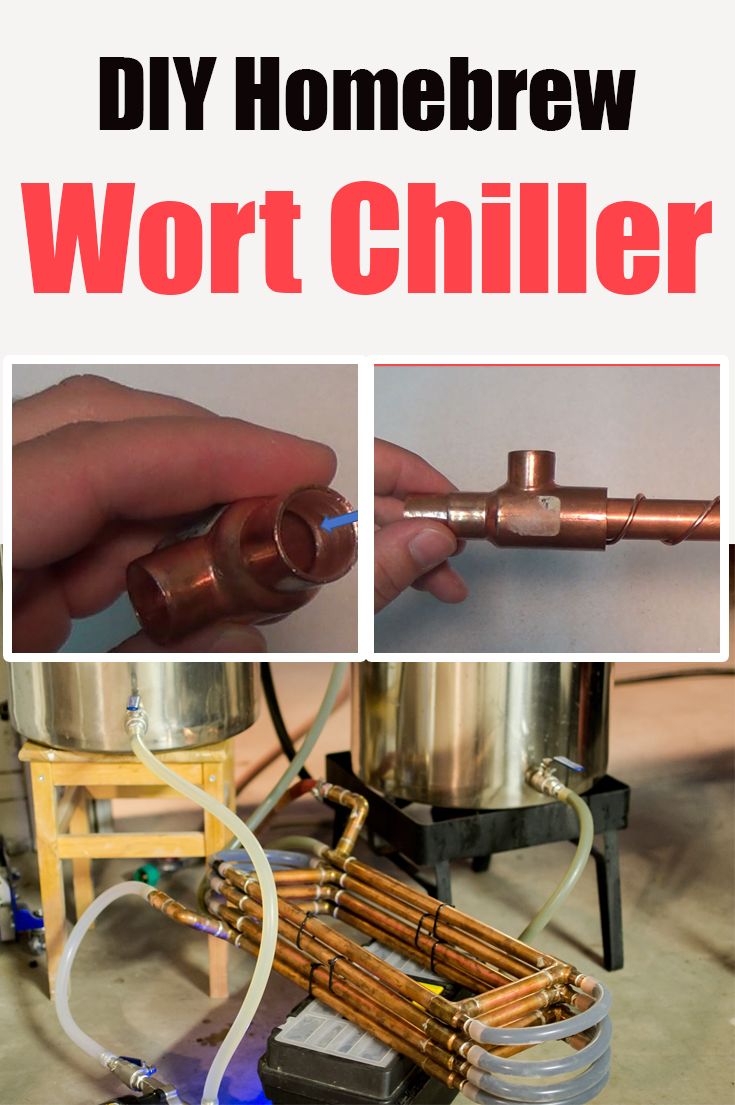
In this instructable, i am going to demonstrate how i built a wort chiller for homebrewing beer.a wort chiller is a device that cools down wort (unfermented beer) after boiling. To use your new diy wort chiller, immerse the chiller in the boiling kettle when you have around 10 minutes of boil time remaining to ensure tubing is sterilized by the time it’s time for cooling.
 DIY Counterflow Wort Chiller in 2019 Home brewing
 Stir Plate DIY Build Home brewing beer, Home
 Dual Coil immersion chiller Home Brew Forums Home
 2 vessel electric system with mash tun and boil kettle
 Chill Wizard Inspired Pump/Chiller Station Home Brew
 Pin en Homebrew
 Cradle/carrier that incorporates a plate chiller and pump
 diy counter flow chiller Home brewing equipment, Brewing
DIY Wort Chillers on a Budget Joshua Austin hbtwort
 wort chiller stand Google Search in 2020 Home brewing
 DIY Counterflow Wort Chiller Home brewing equipment
 DIY Counterflow Wort Chiller Build Home Brew Forums
 DIY counter flow wort chiller Beer Accessories
 DIY Immersion Wort Chiller (With images) Home brewing
 Counter flow wort chiller. Can add more surface area as
 DIY Wort Chiller Beer maker, Beer brewing, Home brewing
 The "ExChilerator" Counterflow Wort Chiller Home brewing
 DIY Counterflow Wort Chiller Build Home brewing, Brewing
 DIY Counterflow Wort Chiller (With images) Home brewing


Comments
Post a Comment